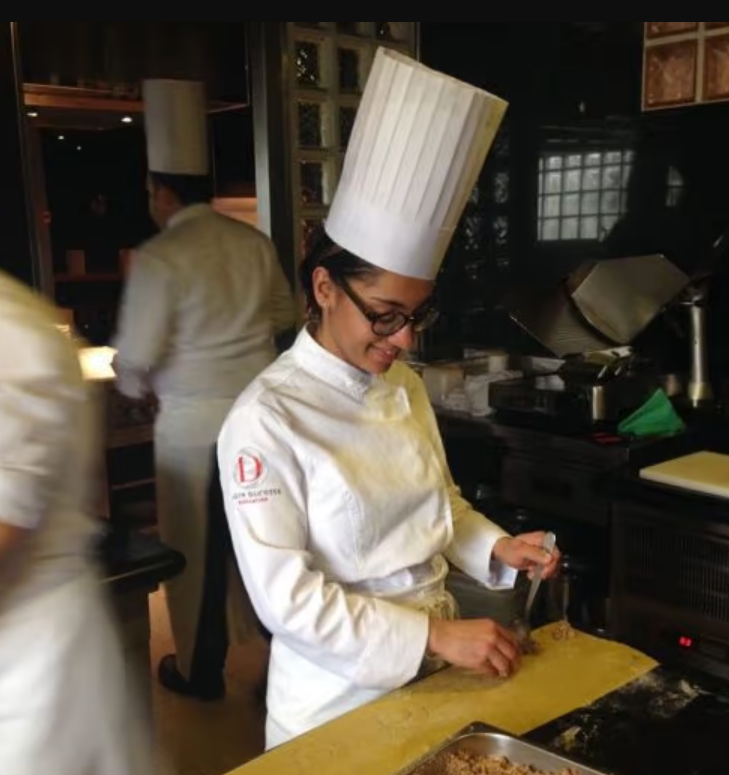
Frigidaire Parts

04 February, 2010

Caramelised Corn with (lots of!) Fresh Mint

 Minty caramelised corn
When anybody talks about corn, I’m all ears. Just given me corn, butter, salt and pepper and I can eat that for all my meals, but make sure there is lots of butter. I’m always on the lookout to have corn in a newer, more interesting way. So when I saw a mint corn recipe on The Wednesday Chef, it is anybody’s guess that I’d “Star” it in my feed reader.

While I still do not enjoy traveling by train to work, I’ve begun to focus on the silver lining. The good part about traveling by train is that there are some girls that will hop on to sell some extremely fragrant and fresh, local produce. So fresh, that you can smell the gorgeous mint at the other end of the train compartment! Plus along with this, you can catch some recipes and tips on mint usage being exchanged amongst the women, and if you’re a part of the click (knowing Marathi is mandatory for this), you can get your hands on the finished chuntey or minty chicken or mint and potato salad on the same train the next day. Funky setup. 

Corn + Mint

As soon as I got my hands on a huge bunch of mint, I put aside a bowlful of it just for the minty corn recipe I’ve had at the back of my mind. I’ve never caramelised corn before, so this was a first for me. While it cooked, I loved to hear the corn popped and the whole kitchen smelled of buttery goodness. Try it, you’re going to love it. And if like me, you believe that mint and lemon is a match made in heaven, then add some lemon zest to the corn. It will smell spectacular.

Also, I added a teaspoon of sugar to the corn when it was cooking. I'm not sure where, but I read many years ago that adding sugar to corn brings out its natural sweetness. I'm yet to figure whether it's actually true or an old wives' tale. Have you heard of something like this?

Minty caramelised corn

Caramelised Corn with Fresh Mint
Serves: 3
Adapted from: The Wednesday Chef

15 oz fresh corn (you can use frozen as well)
2 tbsp butter
1 tsp sugar
6 tbsp fresh mint, chopped
Salt
  1. Cut the corn off the cob from 3-4 corn ears.You can use a knife or get yourself one of these funky things if you can get your hands on them.
  2. Wash, dry and chop up the mint leaves. 6 tablespoons looks like a lot, but it's going to wilt with the steam from the corn.
  3. In a wide skillet, melt the butter over high heat. Add the corn  and sprinkle the sugar over it and cook, stirring often, until golden and browned (kernels may begin to pop), about 10 minutes. Stir in the mint and sprinkle with salt.  Make sure you add the mint right at the end - you don't want it to cook with the mint, but simply infuse the fragrance from the leaves into the corn when it's warm. Transfer to a serving bowl and serve while hot.


29 January, 2010

Mulberry Yoghurt

Mulberry Yoghurt

Of late, I’ve been eating fruit yoghurt every morning. This is one breakfast item I haven’t gotten bored of ever since I discovered the goodness that a berry + yoghurt mixture can yield. Fast forward to January ‘10, I still eat berries and yoghurt with the same gusto. Of course, sometimes I use regular yoghurt instead of making my own vanilla yoghurt. But hey, such shortcuts are allowed in the mornings where all you want to do it satiate that grumbling tummy.

I like my fruit yoghurt to be really fruity – definitely not the kind that just leaves you with a hint of the flavour and you’re forever guessing what that fruit might be. Today I made myself mulberry yoghurt for the first time. And you know what made me so happy about it? It turned a much deeper shade of purple after sitting in the refrigerator for a few hours!

Mulberries

I loved how thick and creamy the yoghurt was - sweet and slightly tart from the berries. I can eat a huge bowlful of it and be a happy, happy woman for the rest of the day. You know the best way to maintain the thickness of the yoghurt? Blend the fruits and stir the yoghurt separately. You might feel lazy to use up more dishes – but this is absolutely critical to achieve that unctuous texture. Once that’s done, just stir in the fruit puree into the yoghurt and that’s it! Deliciousness awaits you!

Mulberry Yoghurt

150g mulberries
400g plain yoghurt
4 tbsp sugar or honey (if you'd like it healthier)
4 tbsp caster sugar (more or less, depending on how sweet your berries are)

  1. You can either blend the mulberries with an immersion blender or roughly squish them up with a fork for some added texture. Add the sugar as well.
  2. Stir the yoghurt in a bowl until it loosens up to yield a uniform consistency.
  3. Now pour the fruit pulp/puree into the yoghurt and stir together until evenly blended.


26 January, 2010

Rich, luscious Chocolate Mousse

Chocolate Mousse

Chocoholics – you’re going to love this!

I made a chocolate mousse the other day and I cannot begin to tell you how delicious it was. I’m usually the kind who feels squeamish about having raw eggs in my desserts – especially yolks, but in this mousse you just can’t tell. Make sure to use really fresh eggs. And if you are still worried about it being raw, I suggest you use pasteurised eggs, and if you’re in India where such a category of eggs is unheard of, then simply pasteurise them at home. It’s easy.

White Chocolate Shavings

The chocolate mousse is so rich, so silky and it feels so wonderful in the mouth that you’re going to get hooked on to it. And because you can make this in no time, you can treat yourself to a luxurious chocolate dessert whenever you feel that urge to satiate a chocolate craving. Really – just read the steps below and you will know. For the best flavour, remember to use the finest chocolate you can get your hands on and you will be on your way to chocolate heaven.

I referred to the chocolate mousse recipe that I found in Pure Chocolate as well as the one on Smitten Kitchen to arrive at my version of chocolate mousse. You should totally try it. And let me warn you – sharing this is going to be hard.

Chocolate Mousse

Chocolate mousse
Yield: 6-8 servings

8 ounces / 225g bittersweet chocolate (no more than 60% cacao), chopped
3/4 stick / 3 oz / 75g unsalted butter, cut into 6 pieces
3 large eggs, separated
1/4th cup sugar
1 cup / 200g very cold heavy or whipping cream
2 ounces / 60g white chocolate shavings

  1. In a large bowl, set over a saucepan of simmering water, melt the chocolate and butter and stir until smooth. Remove from the saucepan and switch off the heat.
  2. In the same saucepan (now with the heat turned off), set a small bowl and beat yolks and sugar with your electric mixer until thick enough to form a ribbon that takes a few seconds to dissolve — this will take about two to four minutes to achieve. Whisk yolks into chocolate mixture.
  3. In the bowl of a KitchenAid, beat the egg whites until they just hold soft peaks. Remove from bowl and set aside.
  4. In the bowl, whip up the cream until it just holds stiff peaks.
  5. Fold the whipped cream and beaten whites into the chocolate mixture, gently but thoroughly. Transfer to 8 (4 ounce) ramekins and sprinkle with the white chocolate shavings. Let the mousse set in the fridge for about an hour before serving.
    Note: The mousse will keep for upto two days in the refrigerator.


20 January, 2010

Chocolate Caramel Tartlets

 Chocolate Caramel Tartlets

Or better still the title of this post should be Oh. My. Goodness. Because that’s what I said when I bit into this luscious caramel tartlet covered with a thick layer of dark chocolate and then sprinkled with some nutty cacao nibs.

These tartlets are small and delicate with a buttery, almost cookie like crust layered with rich, thick caramel and stiff dark chocolate topped off with a few precious Valhrona cacao nibs (or some sea salt, if you like). I earnestly urge you to have this recipe in your repertoire because this really doesn't get better than this. Need another reason? You can make these much ahead of time when you have guests coming over. Even though I’d made 24 such tartlets, I didn’t get enough to satiate my caramel-cravings so I made yet another batch for myself today. I can’t make up my mind about what I liked most about them – each of the 4 distinct layers: crust, caramel, chocolate, nibs/salt blew my mind. I was afraid the caramel would be too sweet for my liking, but the bittersweet chocolate and the mellow crust did an excellent job setting off the sweetness, and the salt gave it a well rounded flavour coupled with a classy touch. I’d never been a fan of salt in my dessert, but with this tart, I’m a changed person.

Chocolate Caramel Tartlets

I look for every opportunity I can to use vanilla beans, so I split and scraped half a bean to use for the caramel. What I also did was let the bean sit in the warm caramel for some more of the vanilla goodness to infuse into it. Doesn’t the caramel look beautiful with those specks of vanilla?

So, since I made them twice, I tried them with a chocolate ganache, as the recipe prescribes and then this time, I melted bittersweet chocolate with 2 tablespoons of milk just so that the chocolate loosens up a bit and isn’t too firm to the bite when it has set. I liked it more this way.

Caramel Chocolate Tartlets

Chocolate Caramel Tart
Adapted from: Lottie and Doof and the original recipe is by Claudia Fleming (I so want her book!)
Yield: 1 10 inch tart or 24 small tartlets

For the Chocolate Tart Dough
8 tbsp / 1 stick / 112g unsalted butter, room temperature
1/2 cup plus 1 tablespoon confectioners’ sugar
1 large egg yolk
1 teaspoon pure vanilla extract
1 1/4 cups all-purpose flour, plus more for rolling
1/4 cup unsweetened Dutch-process cocoa powder

For the Caramel Filling
1/2 cup water
2 cups granulated sugar
1/4 cup light corn syrup / glucose
1/2 cup heavy cream
8 tablespoons (1 stick) unsalted butter
2 tablespoons crème fraîche (I added extra cream because this is hard to find!)

For the Chocolate Layer
3 1/2 ounces extra-bittersweet chocolate, finely chopped
2 tbsp milk

Final touch
Sea salt or cacao nibs 
  1. To make the tart dough: In the bowl of an electric mixer fitted with the paddle attachment, cream butter and confectioners’ sugar until combined, about 1 minute. Add egg yolk and vanilla, and beat until smooth. Sift in flour and cocoa powder, and beat on low speed until just combined. Scrape the dough onto a sheet of plastic wrap, and form it into a disk; wrap well. Chill until firm for at least 1 hour. You can keep this refrigerated upto to 3 days.
  2. Preheat oven to 325°F/160°C. On a lightly floured surface, roll the tart dough 3/16th inch thick and cut out dough with a round cookie cutter that is slightly larger than the tartlet mould. Transfer it to the mould and press it in gently, especially the corner of the base so that it fits securely. Alternatively, you could make a 10 inch large tart as well. Just roll the dough out in a circle and transfer the fluted tart pan with a removable bottom and press into pan. If it falls apart at all just push it back together in the pan. Chill the tart shell in the refrigerator for 30 minutes.
  3. Prick the shell all over with a fork. Blind bake for 10-15 minutes until done. Let it cool for another 10 minutes or so before removing the tarlets from the moulds. Transfer them to a wire rack to cool. (The tart shell can be made 8 hours ahead.)
  4. To make the filling: Place 1/2 cup water in a large saucepan. Add sugar and corn syrup, and cook mixture over medium-high heat, swirling the pan occasionally, until it becomes a dark-amber caramel (I removed it when it was sort of a medium amber since I knew it would continue to cook off heat), about 10 minutes. Remove pan from heat and carefully (the mixture will bubble up) and slowly add the heavy cream followed by the butter and crème fraîche. Stir until smooth. (The caramel can be made up to 5 days ahead and refrigerated in a covered container.) Pour the caramel into the cooled tart shell and allow to set, first at room temperature and then in the refrigerator.
  5. To make the chocolate layer: Place the chocolate in a heatproof bowl set over simmering water. Add two tablespoons of milk for a softer texture. Spoon this over on individual chocolates and immediately top with cacao nibs or sea salt, whichever you prefer before the chocolate sets. Serve!


14 January, 2010

Cinnamon Sugar Churros

 Cinnamon Sugar Churros

Have you ever tried churros?

No? Okay, you must leave everything you’re doing right now and run to the kitchen. At work? Oh well, just tell your boss that your cat’s sick and you need to take her to the vet or something. Do what it takes to get into the kitchen and get down to making these - right this moment!

This little sticks of dough blew my mind. Awfully easy to make and even easier to polish off – these deep fried goodies might just be something you’re greeted with at the gates of heaven.

Cinnamon Sugar Churros

Exactly how easy are they to make? Just boil some water, oil and salt, throw in some flour, mix in an egg, throw in a blob of butter then pipe it into hot oil  and fry until golden brown and then finally toss it in some cinnamon sugar – that’s it! And then of course, munch away and think of the multitude of ways you can eat these. I’ve listed some fun ways of eating these churros but I'd love to hear your suggestions as well. Someone always comes up with a brilliant idea that would've never occurred to me! So here goes my list:
- cinnamon sugar
- honey
- powdered sugar
- whipped cream and strawberries
- nutella
- white chocolate sauce

And you know what, there couldn’t be a better time to make churros and serve them with hot chocolate than winter! Go. Make. Them. Now.

Churros

Cinnamon Sugar Churros
Yield: 6 servings
Note: I halved the eggs the second time I made them because it was just so dang eggy! So eggy, that my sister said it felt like she were eating an omelette! Here is a much better version of the recipe that yielded amazingly crispy churros that everyone ate up like hungry wolves.

1 cup water
1/4th cup olive oil or canola oil
½ tsp salt
1 1/4th cup flour
2 eggs
1 tbsp / 30g butter
Peanut or canola oil for deep drying
1 cup sugar
2 tbsp ground cinnamon
  1. In a heavy bottomed pan (not aluminium) combine the oil, water and salt and bring it to a rolling boil.
  2. Remove from the heat and add all the flour and mix it enthusiastically together. You will see that the dough clumps up around the spoon.
  3. Place it back on the heat and stir briskly for 30-60 seconds to dry out the excess moisture.
  4. Now in another bowl, beat the eggs together and mix it in with the dough slowly until the eggs are completely incorporated.
  5. At this point the dough will be a slightly sticky, evenly yellow mass.
  6. Stir in the butter and you will see that the dough isn’t sticky anymore.
  7. Transfer the dough to a piping bag fitted with a large star shaped tip and pipe directly into the hot oil. Fry until golden brown then strain thoroughly and transfer to the plate in which the cinnamon and sugar has been mixed and coat evenly.
  8. Serve hot!


09 January, 2010

All Good Things

It feels like I’ve been away from the blog for so long. I miss baking and photographing for the blog so much. All the more because I thought that since I’m going to be baking at work, baking at home would naturally increase. But I surely didn’t weigh-in the part about traveling to work by train. For all my life, I’ve refrained from using the trains. If I absolutely had to, then I’d make sure it was on a public holiday or during non-peak hours so that I’d reach my destination without leaving the railway station looking disheveled and struck by a storm. Man, oh man, it’s a crazy world out there – I learned my lesson too late in the day that flip flops aren’t suited for Mumbai Railway. There has not been a day when my slippers haven’t been stepped on from the back less than 5 times a trip. And to top that I haven’t found All Stars in the colour I’d like or the design yet. Come to India, gorgeous Converse, won’t you? But you know what, it’s all worth it. Especially on the days we bake! One day we even visited a local bakery, where for the first time I walked through one of those huge refrigerators and freezers – the one’s I’ve only seen on television until now. Heck, I even got a private macaron-making lesson, courtesy Daniel!

And you know what, there is some excellent news! It is rather belated for me because I didn’t have a clue about this, and only realised with this tweet that The Purple Foodie is amongst the top 100 Food Blogs on Technorati! It’s somewhere around 60 now (changes everyday), and I’m quite amazed by it. Really? Amongst the top 100 blogs in the world? I owe you guys a huge thank you!

My Paris Loot!
(Click on the image to see the labels on the individual items)

And some more… Here is a shot of some Paris loot that orangefoodie got for me! Thanks to Sweet Life in Paris, I knew that G. Detou and Mora are the places he absolutely must visit for all the things I need! I’ve wanted a French rolling pin for sooo long! And a Madeleine mould. And Tahitian vanilla (yay! I can check this off my 2010 To-do list!). And Fleur de Sel. And lots and lots of baking chocolate. I can't wait to use all these things – oh la la I’m in baker's heaven!


01 January, 2010

Happy 2010!

a year full of baking and cupcakes!

Wish you all a year full of butter, sugar, chocolate, vanilla and tonnes of cupcakes!

Thank you all for being with me through 2009, each and every one of you. 2010 is going to be wonderful. 

Here is a  list of some things I hope to do in 2010:
  • Make macarons (successful ones with feet!)
  • Make marshmallows, now that I finally have a bottle of corn syrup!
  • Make verrines
  • Make fresh pasta
  • Make Spanish churros
  • Make soufflé (chocolate or cheese?)
  • Make an elaborate birthday cake
  • Make candied rose petals
  • Make my own cheese - mascarpone, mozzarella (where can I find rennet?)
  • Make Sriracha sauce
  • Read 6 chef biographies / restaurant stories
  • Try wild rice
  • Try oysters
  • Try Tahitian vanilla
  • Try Frech lavender
  • Try 5 (new) types of salts
  • Buy a blow torch (and then make crème brûlée)
  • Grow my own strawberries
  • Grow more herbs
  • And best of all, make a trip to Paris!
Something you think, I absolutely must try? Let me know!


PS: Here is the Best of 2009 round-up!

31 December, 2009

Best of 2009: Books

This has been the year of some fantastic cookbooks for me. I’ve bought them by the dozen at bookstore sales, received them as gifts and best of all, with the start of the Bread Baker's Apprentice Challenge, I discovered that I could get my hands on books that are hard to find without having to plead with relatives and friends coming down from the 1st World! 'Twas the moment of epiphany.

Some books have been exceptional reads and have inspired me either to bake something from it that very moment or live in Paris! Below is a round-up of my favourite books I've read this year and what makes them so special:

Best of 2009: Books

Baking From My Home to Yours, Dorie Greenspan – This book is without a doubt, the most special book in my collection. Not just because it’s such a brilliant book and that I don’t need to refer to any other baking book, but also because attaining this book has been so hard. Let me tell you the story, I’d asked my cousin to order it for me and send it with her friend who was coming to India last year. That didn’t happen. So when I went there earlier this year, I got it back with me – and this my friends, was a huge ordeal! My luggage was overweight by almost 40 pounds and playing the I’m-a-young-girl-travelling-alone card didn’t really work. I sat with open suitcases at the airport and got rid of the heavy stuff – bags of nuts, chocolate, tart pans, cooling rack, etc. The book had to come out as well –after all, it weighed almost 5 pounds! But since there was no way I was leaving that behind, I carried juggled with a giant laptop bag, a trolley bag and a box of donuts through three airports. My arms were so sore by the end of it!
Recipes:
Chocolate Chip Shortbread (Dorie loved how these looked!)

Baked: New Frontiers in Baking, Matt Lewis and Renato Poliafito – This book will make you want to get up and start baking, at least that's what it did to me – the gorgeous photos along with unconventional ideas is totally worth the book. I always like a book that has personal tones to it, so I enjoyed reading how they setup their bakery. I’ve made their black forest cookies as well as brownies, both of which were phenomenal. I’m surely going to be making a lot more treats from this book in 2010!
Recipes:

Barefoot Contessa Back to Basics, Ina Garten – On the same trip to the States, I enjoyed tuning into Food Network. What I enjoyed the most on Food Network was Ina Garten’s show, so I decided that I must get this book of hers that has received such rave reviews.
Recipes:

Bittersweet, Alice Medrich – Although I’ve just begun reading this book, I have to recommend it because I love how it’s packed with so much information about chocolate. It answers questions like why single origin doesn’t always mean quality chocolate, why you should you cut white and milk chocolate very finely before melting, amongst other things. I like Alice Medrich’s take on bringing out the true flavour of the chocolate by reducing the fat, sugar and eggs so the chocolate can shine (and it didn't even seem like she's trying to put me on a diet). This book has such delicious sounding recipes that I ended up leaving post-its on every other page to come back to, truffles being the ones that are on top of the priority list! My only grouse – I wish this book had more photos.

A Homemade Life, Molly Weizenberg – I read this book for so many days on my way to work because just when I thought I’d read too much, I’d stop because I didn’t want this book to end! I love how Molly combines her life experiences with some very delicious recipes. And the illustrations in the book are just so adorable!

 The Art of Simple Food, Alice Waters – This book has taught me that the simplest of things can taste spectacular. This book is full of ideas that will cater to varied taste buds.
Recipes:

 The Sweet Life In Paris, David Lebovitz – Who doesn’t want to live in Paris? The hilarious book talks about the quirky side of Parisian culture and David Lebovitz’s life in La Ville-Lumière and the home of croissants. The book has got a recipe at the end of each chapter as well! I love that David put a list of resources and places to visit at the end of the book, this was especially helpful when I made a map of places for orangefoodie to visit in Paris for Christmas.


28 December, 2009

Best of 2009: Sweet

Best of 2009: Sweet

Hazelnut Cheesecake: These cute little individual cheesecakes will put you in hazelnut heaven.

DIY Strawberry Pop Tarts: These are without a a doubt the best things I’ve baked up with strawberries! The strawberry season has just set in here and I can’t wait to make these again.

Nutella Pinwheel Cookies: The most popular cookies on The Purple Foodie – these are melt-in-the-mouth cookies with a generous swirl of Nutella and Hazelnuts.

Strawberry Frozen Yoghurt: Handmade frozen yoghurt was the best thing that happened to me in March ’09!

Dulce de Leche: Just look at how rich and luscious it looks. Tell me you’re not tempted to make some!

Oreo Cookie Ice Cream: How can an Oreo cookie lover like me not have this ice cream included in the Best of 2009 list?

Black Forest Cookies: The most chocolatey cookies I’ve ever eaten. So, so, so delicious!

Cheesecake Swirled Brownies: My favourite cheesecake recipe + my favourite brownie recipe = these super awesome cheesecake swirled brownies!

Fig Tart: Just look how gorgeous this is! And it tastes even more delicious. Make the frangipane with vanilla bean for the best smelling tart.


25 December, 2009

Best of 2009: Savory

Best of 2009: Savory

Garlicky Baked Fries: These fries have gathered a mass following ever since I’ve posted them with 109K views and still counting! Go.Make.Them.Now.

Cheddar Cheese Biscuits: Cheesy biscuits are so much more fun than just regular biscuits.

Olive and Rosemary Crackers: Made with olives and with a little parmesan cheese added- these are mighty delicious.

Herb Butter Mushrooms with Smoked Mozzarella: Cute little bites of cheese laden button mushroom make this such a delicious appetizer.
 
Stuffed Eggplant: These will change the opinion of any eggplant hater.

 Zucchini and Goats Cheese Pizza: Who doesn’t love goat’s cheese? This pizza is such a breeze to put together.


Tomato Basil Sauce: The secret to a good tomato basil sauce is to add the basil right at the end so that the flavour of the herb stays in the sauce instead of evaporating away.

Parmesan Roasted Broccoli: Pine nuts + broccoli + Ina Garten = super awesome broccoli.

And Merry Christmas to all those celebrating!  


21 December, 2009

The Big News + Chocolate Hazelnut Marbled Cake


Chocolate Hazelnut Marbled Cake

Before I get to the delicious cake, I want to tell you about the big news I was holding on to a while ago.

If you’re following me on Twitter or Facebook, you might have heard me gushing about finally signing ‘the contract’.  No, it's not some corporate contract boohockey or a typical 9-5 job. This contract is my entry into the world I’ve only dreamed about until now. It’s a world full of butter, sugar and flour – a world I know I’m going to be happy in. Starting January 2010 I will work for a lovely, first-of-its-kind, startup French pâtisserie here in Bombay. Here, I'll work with two absolutely amazing chefs from Le Cordon Bleu, Paris - Pooja and Daniel. When I first baked with them, the day went by quickly and I lost complete track of time - that's when I knew that this is my kind of place. The two of them are so professional and so much fun at the same time. I'm going to love it here!

I’m sure as hell going to miss orangefoodie and my friends at my current workplace, but I know this is one step closer to where I want to be. 5 years ago, when I learned about Le Cordon Bleu cooking school and got my hands on their brochures, I knew I had to study there - I just had to. Back then, my parents didn’t take my passion so seriously and thought my interests were as fleeting as summer, and cooking/baking for a living sounded absolutely ludicrous to them. Luckily, they are so much more supportive of the career switch now more than ever. I am so thrilled about this - my dream of baking for a living is finally becoming a reality!

Here's a wonderfully moist chocolate hazelnut marbled cake that I made yesterday. I used Dorie Greenspan's mocha walnut bundt cake recipe as a framework to create this cake. I substituted  hazelnuts for walnuts and cocoa for espresso. While recipes usually call for milk at room temperature, I've noticed that using warm or hot milk is important for producing really soft cakes that makes all the difference. Don't be scared, the hot milk won't cook the eggs. My mom wolfed down most of the cake and asked for more to take for my grandmom!

Chocolate Hazelnut Marbled Cake


Chocolate Hazelnut Marbled Cake
Adapted from: Baking From My Home to Yours -Dorie Greenspan
Yield: 1 large bundt cake

2 ½ cups flour
½ cup ground hazelnuts
1 tsp baking powder
1 tsp salt
9oz. / 250g. butter
3oz./ 85g. bittersweet chocolate, roughly chopped
1 tsp cocoa powder
1 1/4th cup hot milk
1 3/4th cup sugar
4 large eggs
2 tsp vanilla extract
  1. Preheat the oven to 350F/160C. Butter a 10 inch bundt pan or a loaf pan and dust the inside with flour. Tap out the excess flour.
  2. Whisk together the flour, ground hazelnuts, baking powder and salt.
  3. In a heatproof bowl set over simmering water, melt 2 tbsp butter with cocoa and chocolate. Heat until the chocolate and butter have melted and the mixture is smooth. Set aside.
  4. In a bowl of a stand mixer or in a large bowl, mix together the butter and sugar for about 3-4 minutes – this will look like a thick paste.
  5. Beat the eggs in one at a time, until the mixture looks smooth. Add the vanilla extract.
  6. Now either on a reduced speed, or by folding in by hand, add the flour and hot milk alternately, starting and finishing off with flour (so, flour-milk-flour-milk-flour)
  7. Now take a little less than half the flour and mix it with the chocolate mixture that you set aside earlier. Stir till it is thoroughly blended – don’t overdo it.
  8. What I did was add the white mixture then the chocolate mixture and then the white mixture again into the bundt pan and then run a knife through it once or twice for very visibly distinct two layers. For a pronounced marbled look, stir the knife through the batter a few more times.
  9. Bake for 55-65 minutes or until the knife comes out clean. Let it cool for 10 minutes or so before unmoulding.
  10. Slice and eat! It’s lovely with some mascarpone dusted with caster sugar or some chocolate sauce.


17 December, 2009

Oven-Dried Tomatoes

Oven dried tomatoes

Until now I’ve had sun dried tomatoes from a jar and only after making these cute little babies did I realize what I’d been missing out on – über concentration of flavour. They are the same as sun-dried tomatoes, except that it doesn’t sound as fancy and the job gets done a lot quicker!

While I was at the market last week, I was introduced to these seasonal tomatoes that appear for just two months in a year, so I bought myself a kilo of them. The seller extolled their flavour and when I sat to think of how to use these best, I was sure I didn’t want these tomatoes to get lost as a part of a greater dish, but be the main focus. That’s when I thought of drying them up in the oven to keep a concentrate their flavour.

seasonal tomatoes


I can say for certain that this has got to be the best thing best savory thing I’ve put in my mouth in a while (the fig tart and honey roasted almonds are so good, people!). The flavour of the tomatoes is heightened by chopped garlic and oregano – something you will never find in the regular bottled sundried tomatoes. I thought I’d use them to top a pizza or something, but man these were just brilliant on their own. I snacked on so many last night that these were all that were left to take photos this morning (and you thought I was trying to be aesthetic!) Next time, I’m surely going to double the quantity I make because they shrink so much (not that I didn’t know, but so much?) I think this would make an excellent appetizer tossed with crumbled feta or fresh mozzarella.

Oven dried tomatoes

Oven dried tomatoes

2.2 lb/ 1 kilo ripe tomatoes
coarse sea salt
6 cloves garlic, chopped finely
1 tbsp dried oregano
freshly ground black pepper
extra virgin olive oil
  1. Preheat the oven to the lowest heat setting.
  2. Depending on how big you’d like them, either slice the tomatoes, or halve them (the bigger they are, the longer they will take to dry up). Scoop out most of the seeds and sprinkle with salt and leave them skin side up so that the excess liquid from the tomatoes can drain out. Let this sit for about 15-20 minutes. Excellent thing to do because, this gets rid of the moisture and reduces the time in the oven.
  3. In a large bowl, toss together the tomatoes with the garlic, oregano, black pepper and olive oil. Place the tomatoes on a cookie sheet lines with parchment and place sprinkle the garlic from the bowl on the tomatoes. Cook in a low oven at 100C/200F/Gas 1 for three hours.
  4. If you’d really like to do it the sun-dried way then you can leave it in the sun for up to two days, taking them in at night.
  5. Place the tomatoes in a sterilized glass jar and use within a week. If you’re going to use this over a longer period of time, then over it with some olive oil.