I think an apple pie is one of the first things I baked when I got an oven. I used a pie dough recipe from a nondescript local book and didn’t pay much attention to baking blind (we will get to this shortly). Back then, this was an unnecessary step that the naïve me thought I could do without. I didn’t know the technique behind it, nor the importance as I had only begun exploring the hows and whys of baking.
After poring over my favourite books and reading up quite a bit on the subject of pie dough over the years, I have come to understand them a little better. I love how Alice Water has been so descriptive through every step – you should probably buy The Art of Simple Food just for this chapter, if nothing else.
I don’t believe that there is THE pie crust recipe and that just that one recipe is absolutely foolproof, because with pie, it’s more about the technique and timing – at the end of it, it’s flour, butter and liquid put together.
Making a pie crust isn’t such a nightmare for me as prepping seafood but here are some pointers I have grown to live by:
- The refrigerator is your best friend. Start with chilled or frozen butter and keep putting the dough into the fridge in between steps. In fact, refrigerate everything – the ingredients and the pie dish. Especially when you’re living in a warm place.
- Work with the ingredients quickly. They must, must, must remain cold at all times. A pastry cutter works beautifully, but a food processor or a KitchenAid will do things much faster. Or at least I’d like to think so because I just love my KitchenAid.
- Use ice water. Not water with ice in it, but ice with water. I fill the measuring cup with ice cubes and then add water until it reaches the rim of the cup.
- Don’t add in all the liquid at one time. The amount you need will vary depending on the humidity. It will also be a lot lesser if you’re adding an egg yolk to the pie crust.
- A wet dough it better than a dry one that will crack while baking – add water a tablespoon at a time. If it falls apart like sand, it is too dry. Remember, it will get drier in the oven.
- I like to add an egg yolk for its golden hue; it also prevents gluten development resulting in a tender crust.
- I’ve read good things about vinegar additions in the pie dough. I have yet to try it from the recipe in Molly’s book – A Homemade Life, but vinegar is supposed to prevent gluten development (awesome for bread, but not for the said pie we are about to bake) and help achieve the much coveted texture.If you have, let me know!
- Butter or shortening? They say using shortening yields a more flaky crust. I use all butter because I’m just biased. I’d like to try lard to, but I don’t have access to any.
- Can you see the butter in the dough? That’s your answer to a flaky crust. It’s as simple as that. When you see the butter, you are assured of flakiness. Why? Because the dough will envelope the butter and form tiny pockets, and with heat, the butter in these pockets will melt and pie crust will puff up with the steam (same principles as puff pastry). Flaky crust!
- I prefer using metal pans as opposed to ceramic ones to achieve a crispier crust and for an even crispier base, place the pie pan on a pizza stone or a thick baking sheet.
- If I want a crumbly crust, I simply press the dough into the pie dish. And for a flaky one, I roll out the dough.
- After watching how easy is to roll out the dough (thank you Rachel Allen), sandwiched in a clingfilm, I’m a fan of the method. You won’t even need flour for dusting. Also, when you’re rolling out the dough, it should feel a little tough to roll out. This way you know that the butter is absolutely cold.
- Once rolled out, peel off the upper sheet of cling film and gently invert the rolled dough into the pie dish. Again, be gentle.
- After transferring the dough into the pie dish, first press the dough into the dish and then trim off the edges. Otherwise you will end up with shorter edge. Yes, I’m talking from experience. Also, correctly fitted dough stays put when it is baked and doesn’t shrink. Crimp the edges if you want it to look a little fancy.
- Baking blind is important. It will dry the surface of the crust and help maintain the texture when baked again with the filling. Another nifty trick I picked up when watching Rachel Allen Bake was that she’d brush the inside of the pie after its partially baked with a beaten egg and pop it into an oven for another few minutes. This seals the pie and gets you another step closer to a non-soggy base.
- To blind-bake, after fitting the rolled out dough into the pie, place a piece of parchment in it and fill it with beans or pie weights. More than that I love this tip from Dorie Greenspan – you should butter the inside of the pie crust, before placing a piece of foil and beans for blind baking. Yay for extra butter!
- While baking blind, if you think the edges are browning quicker than you think, wrap some aluminium foil around it.
- When to bake blind? Rule of thumb: for fruit and liquidy fillings bake blind.
- Add your own tips in the comments and share what you think is absolutely necessary to achieve that perfect crust!
Now go on and bake your favourite pie!
Pie Dough
Minimally adapted from: Dorie Greenspan
Yield: 9 inch single crust
1 ½ cups all purpose flour
2 tbsp caster sugar
1 ½ stick butter
1/4th cup ice water
1 egg, beaten
- In a bowl, stir the dry ingredients together.
- Add the pieces of cut butter into this and either cut with a pastry cutter or food processor until the mixture looks like coarse breadcrumbs with a lot of larger pea sized chunks of butter as well.
- Add the water a spoonful at a time until the dough holds itself together without being too dry.
- Transfer this to a Ziploc bag and put it into the refrigerator for an hour or the freezer for a little lesser time.
- Butter a 9 inch pie dish and pop it into the freezer as well.
- Now roll out the dough between two sheets of cling film. Transfer to the pie dish, press into the dish and refrigerate it for another 30 minutes or until it has firmed up. Poke some holes into the crust with a fork.
- While the pie crust is chilling in the freezer, preheat the oven to 400F/200C.
- Butter the shiny side of the foil and stick it tightly to the crust. Fill with dried beans and bake for 25 minutes.
- If the crust has puffed up then push it back down with the back of the spoon. Now brush this with some beaten egg and pop it back into the oven for another 5-7 minute minutes.
- Let this cool before filling it in with anything. Remember, this is partially bakes. for a fully baked pie crust, pop it back into the oven for another 10 minutes or until golden in colour.
Cinnamon Apple Filling:
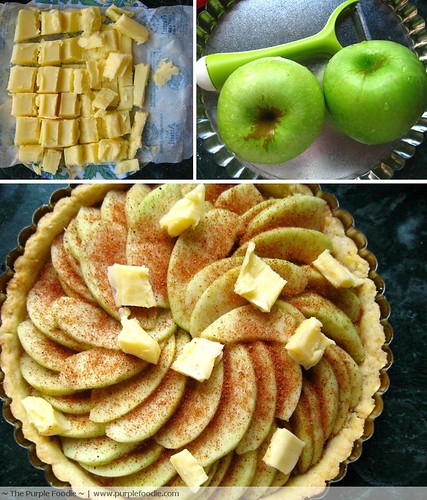
4 granny smith apples – peeled, cored and sliced
4-5 tbsp sugar
1 tsp cinnamon
2 tbsp butter
2 tbsp butter
- Sprinkle 2 tbsp sugar and ½ tsp cinnamon on the base of the pre-baked pie crust.
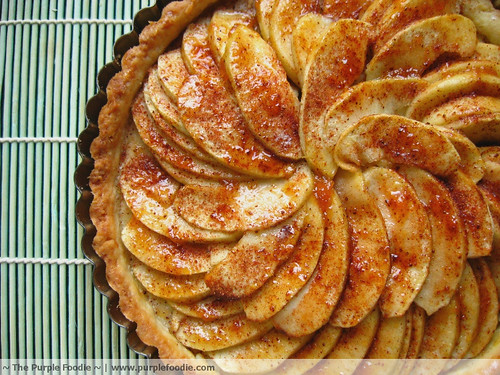
- Arrange the apples in a concentric fashion starting out on the edge and moving inwards.
- Sprinkle the top with the remaining cinnamon and sugar. Dot with a little butter.
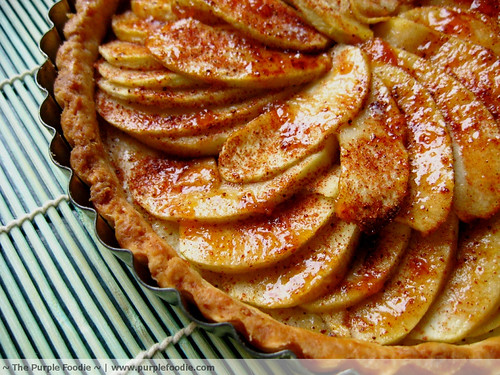
- Bake the pie for 15-20 minutes until the apples look like they’re done.
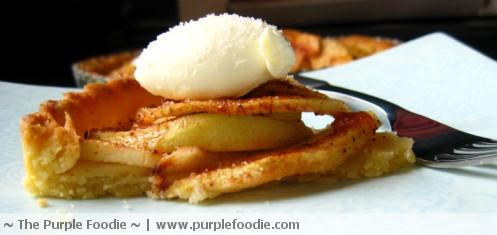
- Glaze with some jelly + water mixture for a shiny look.
- Serve with whipped cream or mascarpone cheese. YUM!